Table of Contents
Why Primitive Fire Building?
Primitive fire building skills are those skills focusing on starting fires without matches, lighters, or an excess of lighter fluid. They can be the difference between life and death in any sort of unexpected situation where the need to start a fire arises, but the ordinary supplies are not on hand, or fail.
Matches are great, but if you get them even a bit damp, perhaps as you pull a co-adventurer out after they fall through the ice, they won’t even sputter. Read on to learn how to get started on your own primitive fire building skills, or hone the ones you already have.
The following is an adaptation of the Primitive Fire Building Methods chapter from my bushcraft fire skills book “Wilderness Survival Skills: Fire Building Techniques” available FREE to Kindle Unlimited subscribers, as an e-book for $2.99, or in print for $4.99 on Amazon
Tinder – The Foundation
Tinder is much more important in primitive fire building methods than in modern methods. Many primitive methods require more steps to transition from the initial ignition to a self-sustaining fire, forcing more reliance on the initial fuel. While some ignition source / tinder combinations will deliver flames like a butane lighter, many will only produce small, glowing coals. These need to be supported and sustained until they can be worked into flames.
Types of Tinder
Flame-Type Tinder
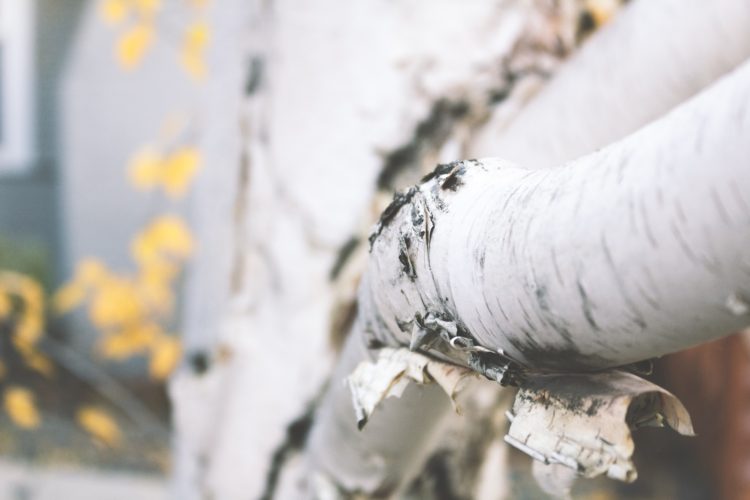
In North American boreal forests, small bits of bark off paper birch trees can be stripped away without damaging them, and fatwood can be collected from rotting downed evergreen trees.
Fatwood is evergreen wood super-impregnated with resinous sap. It is often found at the shoulder of a tree where limbs meet the trunk, or in the center of rotting stumps. Fatwood is often split out of other types of wood.
Splitting even ordinary wood can make it far easier to burn, even immediately without waiting for it to dry. Check out my article on the many benefits of splitting firewood.
Both birch bark and fat wood are very flammable, and if powdered thin by peeling or rubbing with a knife blade, can ignite directly from repeated showers of sparks.
Glowing Ember Tinder
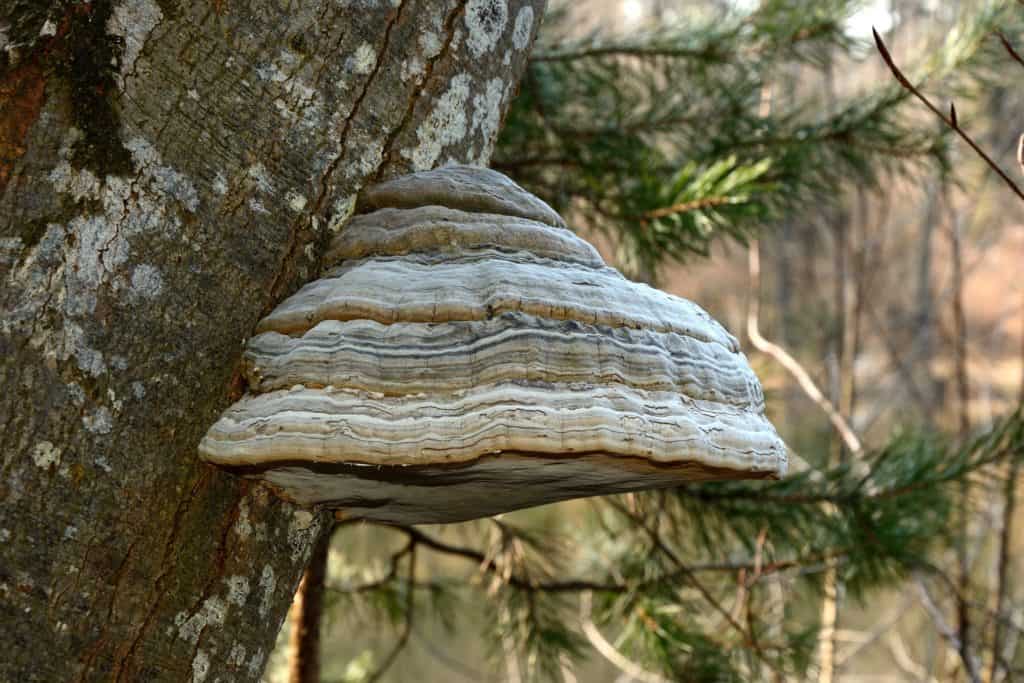
Other tinder sources generate small glowing coals, which must be transferred to a “bird’s nest” of dry grass, bark, or wood shavings, and blown into flame. Some natural examples in a boreal forest are dry cattail fluff and amadou, the fluffy inner skin of the horseshoe fungus or “tinder fungus” (fomes fomentarius). The coal generated by friction fire methods will behave the same way. These coals are very fragile and must be handled with extreme care to avoid putting them out, especially when hard-won through friction methods.
Charred Tinders
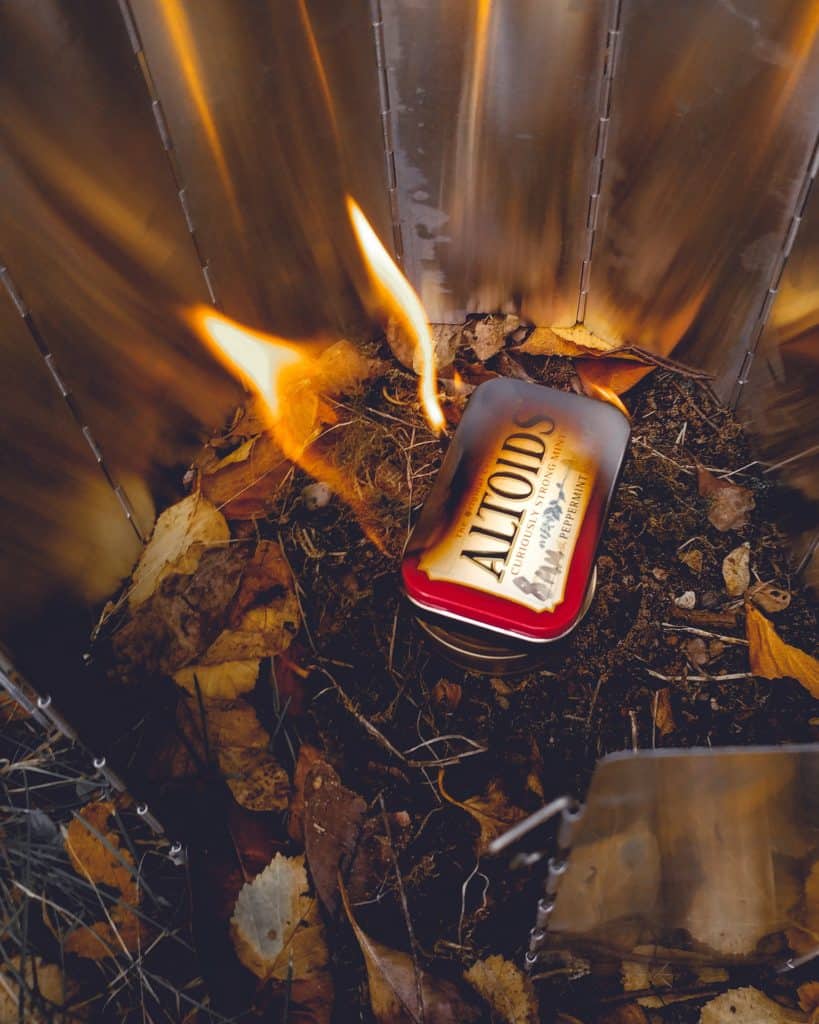
With a little forethought, you can prepare some char cloth or similar material ahead of time. Char cloth is created by heating cotton or other types of natural fiber in the absence of oxygen, burning off some of the Volatile Organic Compounds (VOCs), which leaves behind mostly purified carbon. Char cloth, like charcoal, lights easier than the original material, and burns hot.
An easy way to make char cloth is by loading a metal tin with cloth, poking a hole in the lid, and setting the tin on the edge of a fire. When the VOCs start to leave the cloth, a small candle-like fire will ignite above the hole, and burn until the VOCs are gone. This is your signal to retrieve the tin and allow it to cool.
Char cloth smolders as a coal when first lit but can be easily blown into flame without need of a nest. Other materials, such as amadou or cattail fluff, can be treated similarly to create other charred tinders.
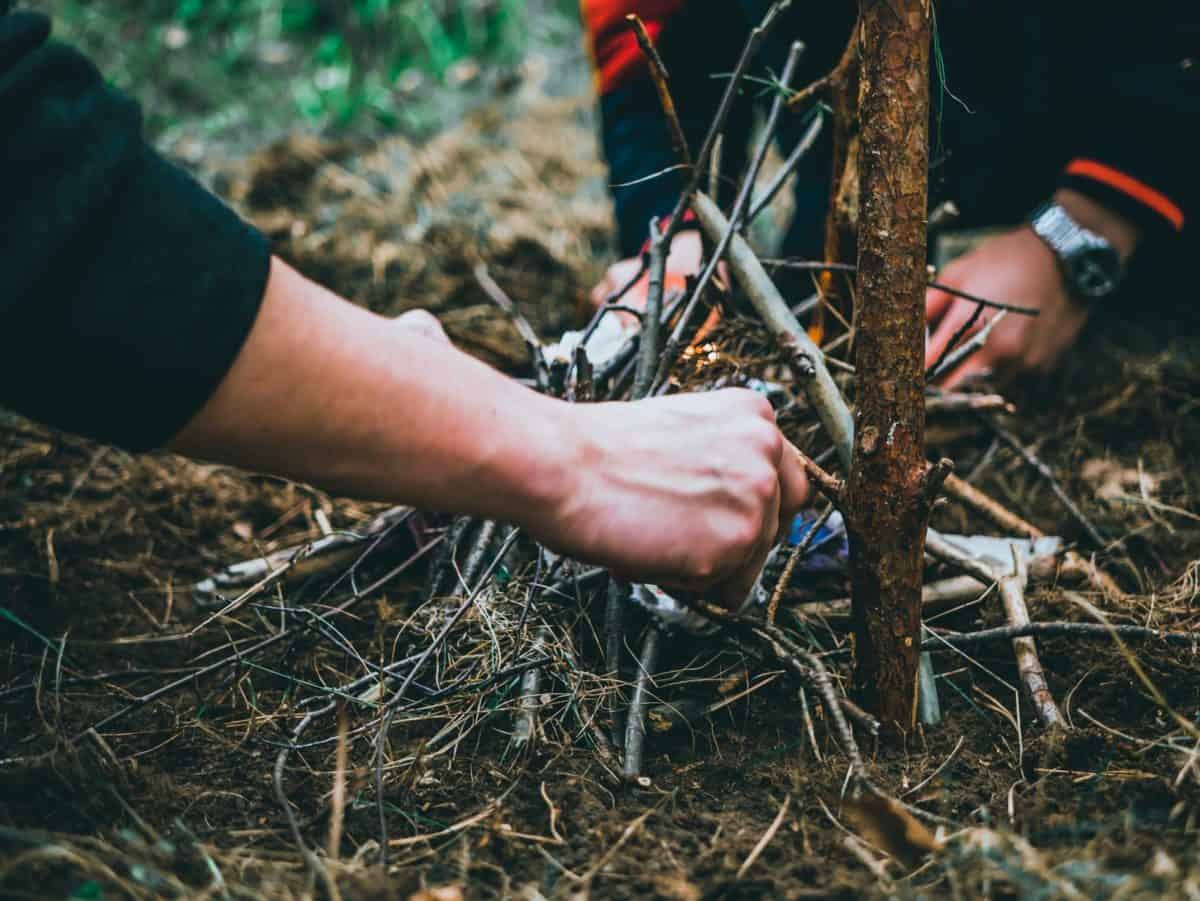
Primitive Fire Building – Friction
Friction fires demand the most planning of any fire-starting method, absolutely dry materials, and the right combination of hardness and resin content of the plow/drill and hearth board. They are also arguably the most impressive primitive fire building techniques, great for showing off around the camp site, or at survival events. The coals generated are very fragile and need to be transferred cautiously to a bird’s nest, blown into flame, and transferred into a ready-built fire lay. Creating easily combustible sawdust that can be ignited by the low-grade heat of manual friction relies heavily on the dryness of the base materials. You can overcome some wetness with exceptional vigor in using the techniques listed in this chapter, but not much.
The goal is to rub sticks together, generating heat and sawdust, until the sawdust starts to smolder and condenses down on itself to form a tight coal. The hardness of the wood pieces and resin content influence the quality of sawdust for coal formation, and the right combination of wood species can take some experimentation to find. Various sources making conflicting claims on which should be the harder piece of wood.
Fire Plow

![United States Army [Public domain]](https://commons.wikimedia.org/wiki/File:Fire_plow_US_Army.jpg)
You need two pieces of wood for a fire plow: the plow and the hearth board. The plow is a hard, dry stick, about thumb-thick and the length of a forearm, held with one or both hands. The hearth board sits on the ground and can be held in place by a foot, or the hands of a partner. The plow is rubbed back and forth, carving a trench in the hearth board, creating sawdust and heat from the friction.
The trench can be started by carving out a channel, using a blade or rock, but this isn’t strictly necessary. Ideally, the bottom of the hearth board is flat, to prevent wobbling around, but a rounded log can be chocked in place with rocks, other sticks, or a channel dug into the ground. Another forearm length log, this one about twice wrist thickness, with the top and bottom third split off is a great candidate for this board.
Again, dryness of the materials is essential. Given enough time, the correct amount of pressure, and a bit of skill, it’s possible to coax a coal out of the sawdust, transfer it to a bird’s nest, and blow it into flames.
Hand Drill – Minimum Technology
The other major class of fire by friction is the drills group, which are all variations on the hand drill, the simplest form. A hand drill set consists of a spindle and hearth board, this hearth board can be much smaller than the one used in a fire plow. The most important dimension for a hearth board is thickness, as a notch needs to be cut or carved into the edge of the board to funnel the dust into a coal. Instead of rubbing a stick back and forth, the drill uses friction from the spindle rotating in a hole, much like a power drill, to produce the coal.
The hand drill spindle should be a hard, dry, very straight stick, about the length of an arm. The bottom of the spindle should be about the diameter of a penny, slightly thinner at the top. The spindle needs a rounded point on it. The hearth board, should be half an inch thick and needs a hole started with the tip of a knife, centered about the thickness of the spindle away from the edge.
Get Set Up
The tip of the spindle is then set into the beginning of the hole, with both hands on either side of the spindle, in a prayer pose at the top end. With a firm, downward pressure, rotate the spindle back and forth between your hands, allowing them to progress down its length to a few inches above the hearth board. Reset your hands at the top, and repeat the action, over and over, until you form a good hole. At this point, darkened sawdust should be visible rimming the hole on all sides. To collect and concentrate the rest of the dust, a notch needs to be cut into the hearth board.
Starting at the edge of the board, make two cuts towards just shy of the center of the hole, spaced about half an inch apart on the board edge side. Set the resulting v-shaped notch over something to catch the coal, like a dry chip of bark or thin split of wood, and ensure the bird’s nest and fire lay are ready. Then, set the spindle back in the hole, and spin vigorously, but with endurance in mind, as even with good materials and the right shapes, this process will take several minutes. Eventually good dark sawdust should start to collect into a coal, and a thin wisp of smoke will trail out after several more minutes of work. The first wisps will not indicate a robust coal; the drilling must continue for several more minutes to consolidate the coal and ensure success.
Bow Drill

Parts of the set
A bow drill uses the same idea of a spinning stick, but the higher technology allows for inferior quality woods to be used with success. A bow drill set consists of four pieces: a hearth board; a shorter, thicker spindle; a top block; and a small bow. The hearth board is the same as that used in the hand drill, and the spindle is similar, but only about forearm length and thicker, at about the diameter of a nickel.
The top block can be anything low friction, from a smooth piece of wood or rock, to a knife handle with a hole in it. This is held in the non-dominant hand, braced against the knee of the foot holding down the hearth board, and is used to provide and control the downward pressure on the spindle. The “bow” is a springy stick about arm length or shorter, with some sort of robust cordage to serve as a string.
Get in Position
Twist the spindle into the string of the bow, taking care to ensure it does not end up between the string and the bow stick, but rather on the outside of the string to avoid pinching and throwing the spindle. Seat the spindle into both the hearth board and top block, move the bow forward and back in a sawing motion, and take care to balance the spinning and downward pressure.
The usual technique to manage all the pieces of a bow drill is to (from a crouch with the knee of your dominant hand side on the ground behind you) hold the hearth board down with your foot on your non-dominant-hand side, with the top block gripped in your non-dominant-hand, pressing down and braced against the knee. Set your dominant-hand side knee on the ground behind, and hold the bow in your dominant hand.
Saw Away
Once you have the hearth board hole and notch primed and ready, saw away vigorously on your bow, taking care to balance the downward pressure with your non-dominant hand. With proper materials and technique, you can generate a good coal in under a minute, but lower quality material or imperfect technique may require you to work for several minutes before you generate a coal.
Primitive Fire Building – Sparks

With the right tinder and some source of sparks, you can make a fire with much less energy expenditure than by friction. Spark sources in the modern day can be a battery and steel wool or a foil gum wrapper, a ferrocerium rod (I recommend a thick, heavy ferro rod, like this one), or striking various metals against each other, but in the back country, sparks have to come from less obvious sources.
Flint and steel were the primitive fire building tools of choice for European explorers, but flint is not always readily available. Fortunately, you can use any object harder than steel to create sparks by striking it against steel. The sparks are just tiny flakes of steel, shaved off by the impact, and super-heated by friction and rapid oxidation as they fly. Chert, obsidian, quartz, flint, and even glass are some of the most common, but for the non-geologist, trial and error works fantastically to find a hard, spark-producing rock.
What about Stainless Steel?
On the topic of spark-producing steels, many modern stainless steels are far more difficult, if not impossible, to create sparks from, and many knives and other outdoor supplies are now made from stainless steel. If you’re interested, I wrote a whole article on what makes some steels work better than others with natural flint.
When stuck without good carbon steel to spark, trial and error of smashing rocks against each other can still sometimes produce serendipitous sparks, perhaps from iron-bearing ores. The best spark-catching tinders for starting fire in this way are char cloth, and dryer lint from a good load of new cotton towels. In the absence of those tinders, finely shaven or powdered birch bark or tinder fungus will do.
When using a purpose-built steel striker from a flint and steel kit, set the tinder on top of the flint fragment, and hold it with a very sharp, chipped edge pointed outward toward your other hand. The second hand, holding the steel, strikes downward along the edge of the stone, tossing shaved-off sparks onto the tinder, hopefully starting a smolder. The spine of a knife can be carefully used in place of the steel striker, but when using more improvised spark sources, tinder placement will need to be carefully considered to avoid injury while maximizing likelihood of catching the spark.
Primitive Fire Building – Refraction

Sometimes, you can find yourself without good materials to build a friction fire set, and strike out on finding spark-producing materials. That leaves one last “primitive” fire building technique – harnessing the sun.
The sun provides plenty of energy to start a fire as well, you need only focus it. You can use any clear convex object to focus the sun’s light and heat from a large area into a smaller area, raising the temperature. Some children use magnifying glasses to focus the sun and burn ants, but a better use of this power is starting fires.
Fire by refraction was my favorite show-off method as a kid at camp, especially because the counselors usually doubted it would work. With a large enough lens, even low-quality tinder can take light, but with most small magnifying glasses or other lenses, very dry paper works best. To practice, use dry paper and a very large magnifying glass.
Bringing it in to Focus
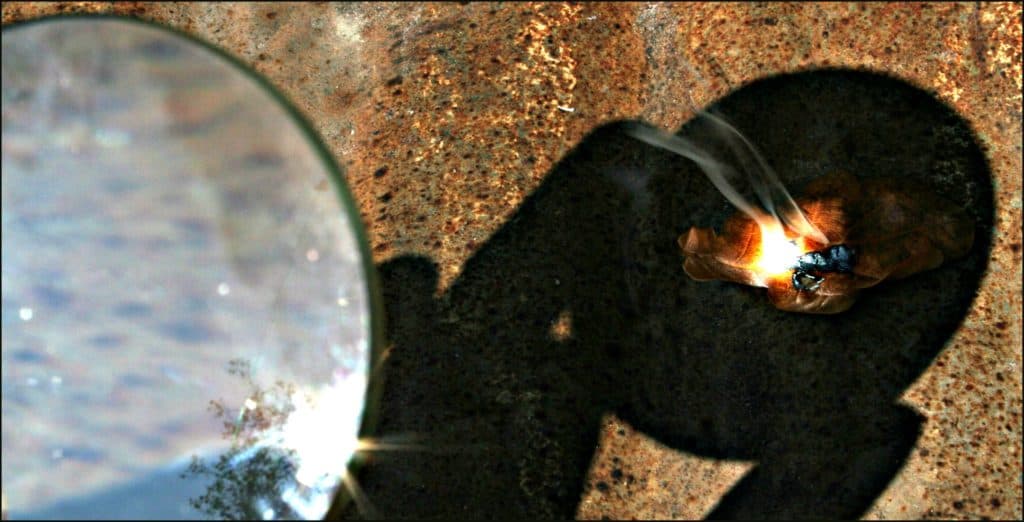
Pick a sunny day (it can work with clouds, but is much easier without), a large glass, and some balled-up newspaper. Head to an area with open sky and put the sun behind your back. Set the newspaper on the ground and hold it down so it doesn’t blow away and bring the magnifying glass up as if looking through it at the paper.
You need to line the glass up with the sun shining straight on it to work most effectively, imagine the surface of the glass is the mouth of a long tube you’re trying to shoot the sun’s light straight down onto the paper, and you’ll be pretty close. Then start moving the glass towards and away from the paper, watching the circle of light expand and contract on the paper. Be careful, it can burn you when focused correctly, and the very bright light can hurt your eyes if you stare at it too long.
If you’re struggling…
The trick is to blow gently on the newspaper. Try to keep the circle of light as small as possible on the paper. If the paper doesn’t immediately burst into flames, try tilting the glass a bit in each direction, and moving refocusing it on the page. Sometimes it’s easiest to see that the lens isn’t tilted properly by purposely un-focusing the circle of light until it’s about dime-sized and looking to see if it’s perfectly round. Any tilt to the alignment will cause the circle to get squished into an oval, and that small misalignment will make lighting the paper much harder.
When the paper chars away in one spot, chase an edge of the hole with the light, and keep gently blowing on it. The heat is there, you just need enough oxygen. It can take some effort to get it the first few times, but the satisfaction is quite worth it.
The very large magnifying glass just makes it easier, in the right conditions, I’ve used lenses about the size of a dime. You can use other objects as well, including water bottles, ice chunks, or glasses from someone far-sighted. Anything clear and convex will work.
Check out the Full Book
This post was an adaptation of the Primitive Fire-Starting Methods chapter from my bushcraft fire skills book. If you enjoyed the content, check out “Wilderness Survival Skills: Fire Building Techniques”, available FREE to Kindle Unlimited subscribers, as an e-book for $2.99, or in print for $4.99 on Amazon
Would you have any interest in being our guest over the Aug 13,14 weekend on Kodiak Island AK.we could fly you up here and house and feed you. We are putting on a “Bushcraft” event as part of a new ministry to attract a group of folks here we don’t usually come in contact with. I’m needing a person to “teach” primitive fire starting on those days. Come early ,stay late see Alaska like few do ( worlds greatest salmon fishing too) . Reach out to me if you have any interest. John Walker.