
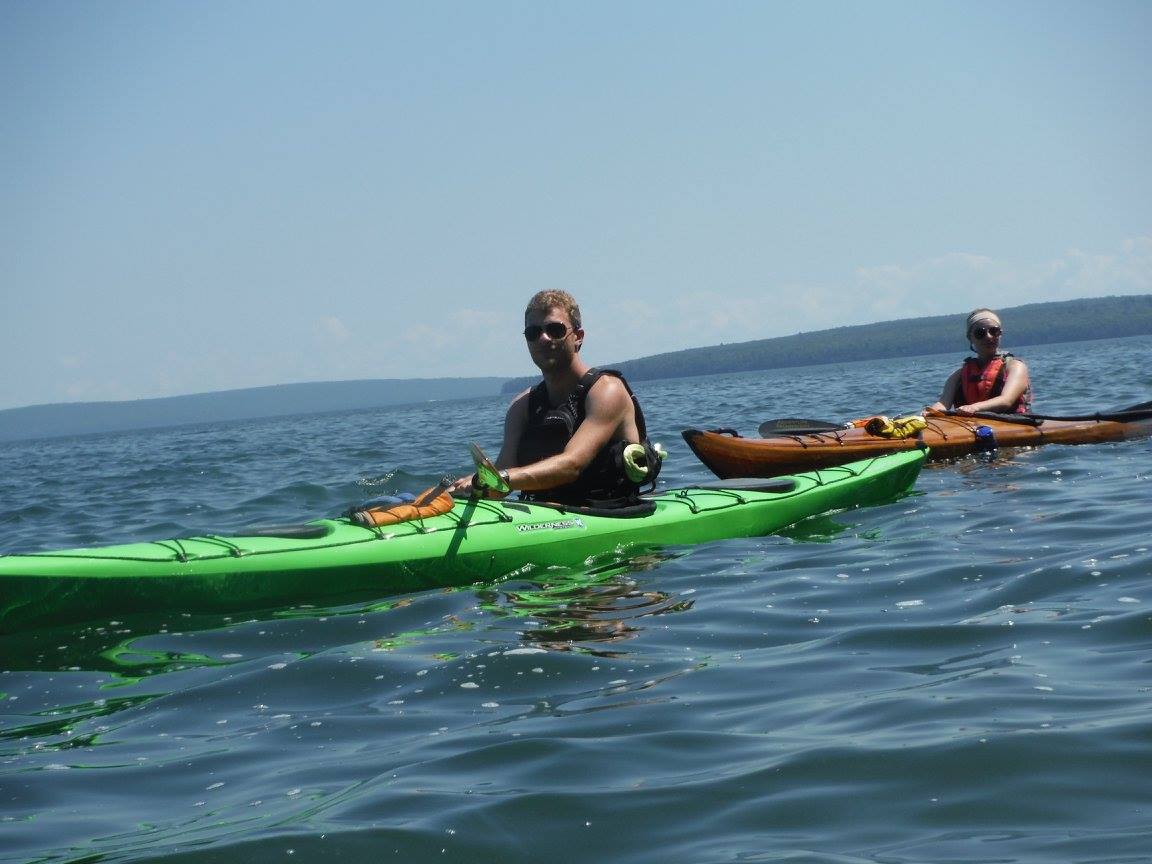
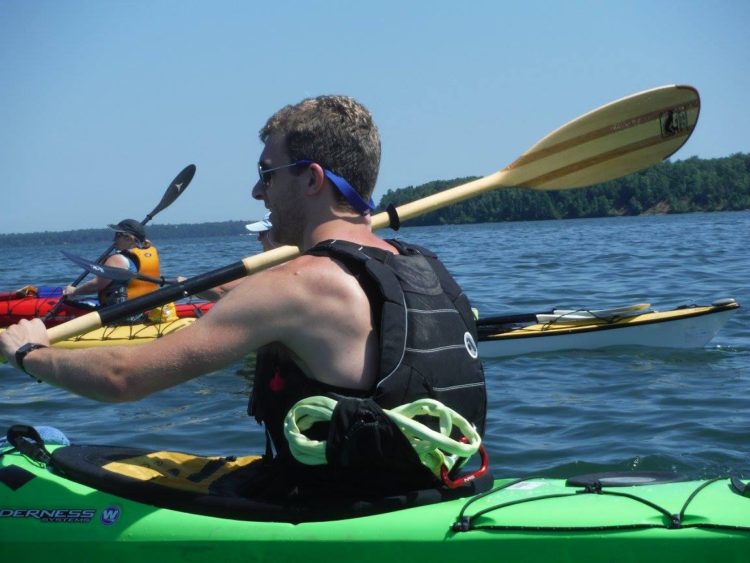
I was incredibly fortunate growing up, in that my best friend’s parents owned a dive and adventure center. For a few years, the summer camp I worked at teamed up with that shop to offer an Apostle Islands Sea Kayaking trip.
I’d grown up paddling rivers, streams, and small lakes, and counted myself pretty good at it, too. But the raw power of Lake Superior, more of a freshwater inland sea than a proper lake, was something else entirely.
Fortunately I was with a team of experienced kayak instructors much more familiar with water of that scale. They had brought along all the supplies we would need, and we spent almost two days of our week-long trip playing around in bays and harbors along the shore, practicing the skills we would need for island hopping later in the week.
We ran that trip for only a few summers, but the number of unprepared and under-prepared people we encountered in less than two months of total time spent in the National Lakeshore was astounding.
Kayaking big water is dangerous. The Great Lakes in particular have a nasty way of sneaking up on people who, like me, didn’t expect such power so close to home. Last summer, a family of four were rescued near Pictured Rock in Michigan, while the summer before, a father and three children died in the Apostle Islands.
Before you consider venturing out on big water, even just for a short day trip, you need to make sure you’re packed for what could happen, not just what you plan.
The National Parks Service has published a list of what to bring on any paddling trip, and I have a few additions for you as well.
Not only do you need to bring this full and complete list, but you need to know how to use every item on it. Get out and practice, as reading can never teach you the muscle memory you’ll need when a life depends on it.
Table of Contents
The Gear List:
A few of these are optional, but for the most part, bring it all. Unlike backpacking, in long-distance kayaking weight isn’t that critical. It’s certainly easier to paddle a lighter boat, but a few ounces here and there won’t make much of a difference.
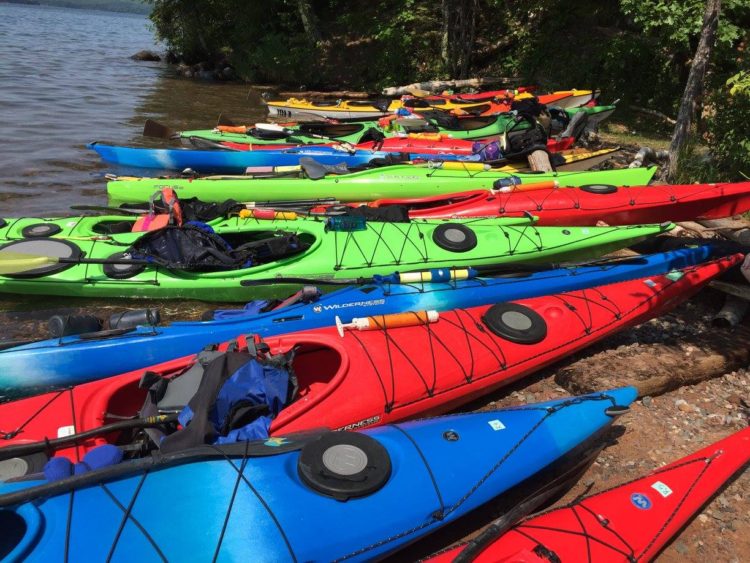
Bright, Warm-Colored SEA Kayak
A sea kayak is long (16′ is about the shortest), with a curved or contoured hull bottom, and has a fairly small cockpit. They should also be brightly-colored so you’re easily spotted in by larger boats that could run you over.
Be aware of the brand behind your sea kayak. There’s a lot of things in life that brand isn’t a big deal with, but with kayaks, it really does matter. Brands like Wilderness Systems (hands down has the best seat in kayaking) and Perception are expensive, but they’re well worth it. I don’t skimp on climbing gear, sea kayaking gear, or anything else that my life depends on. As much as I love Ozark Trail for car camping gear, don’t go grab an off-brand sea kayak.
Kayaks with big open cockpits will fill up with water in the spray. Sit-on-tops are inherently unstable, and don’t let you lock your knees and thighs into place to absorb the roll of the waves in your hips. Make sure the kayak has a comfortable seat, foot pegs, and thigh braces, all of which must fit your body well to work.
Before ever, EVER attempting any sort of paddling in big water with a tight-fitting kayak like a sea kayak, you need to practice wet exits in a similar boat. It can be confusing, disorienting, and terrifying to suddenly end up upside-down in a kayak and find you haven’t just slid out of the boat.
All you need to do is pull your knees in towards each other, reach forward and yank your kayak skirt free of the combing (if you’re wearing one), and push yourself free. But you absolutely must practice this before venturing out, reading about it is NOT enough.
Flat-bottomed boats that feel stable in calm water will conform to the will of the sea, sticking to the orientation of the waves, tossing you all over the place. That “tippier” rounded or v-hull design affords more control in rough water, and is a must for any long trips.
Some sea kayaks will have foot-pedal-operated rudders, or flip-down fins called skegs. The drive systems for both of these are vulnerable to jamming up when sand gets into the works, so make sure they’re clean and operate smoothly. A rudder jamming hard to one side midway through a big crossing is not something you want to deal with.
A sea kayak should have bulkheads separating out dry spaces behind you and out past your feet, and a good one will have a small “day hatch” just behind the cockpit. Those dry hatches keep your gear safe while you splash around all day, and serve the extra purpose of flotation for the boat if you capsize.
I designed my cedar-strip sea kayak so that the bulkhead behind the seat slopes in a way that lets me lift just the bow out of the water, and have all water drain out of my upside-down boat. Handy in big water, normally you have to sit there pumping water out afterwards.
Also a must is plenty of deck rigging. You’ll need a lot of gear while you’re out, and you need to be able to get at it fast. Spare paddles, emergency gear, and snacks all need to be in easy reach.
Paddle (and Extra Paddle!)
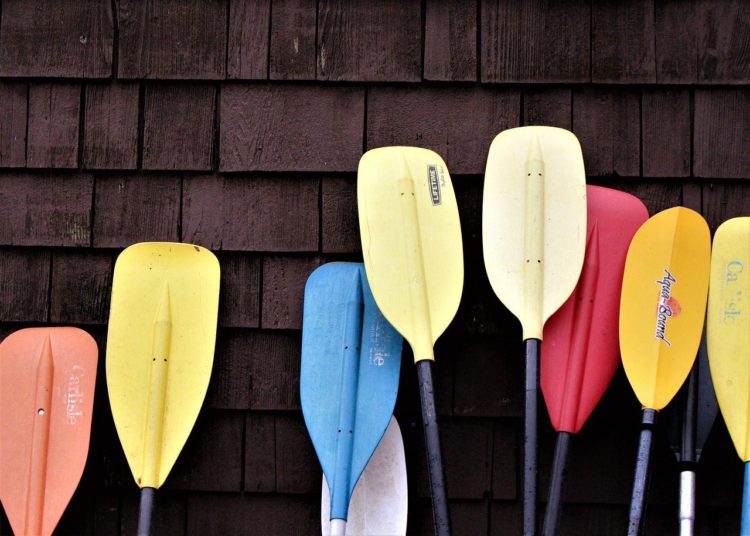
Pick a bright color that contrasts well with the water you plan to paddle for easy visibility. Carbon fiber is great, but black paddles have a tendency of slipping away unnoticed during a rescue.
Make sure your paddle fits you well and is comfortable to use, and go for a feathered design (one blade is twisted about 10-15 degrees relative to the other) to cut through the wind.
Sea kayaking is very well suited to the Greenland kayak paddle style, and I highly encourage you to give it a try if you ever get the chance. You can build yourself a Greenland paddle (check out my article and video if you want to give it a try) for just the price of a cedar 2×4 to get a feel for it.
Greenland paddles have much more narrow profiles, making them perfect candidates for spare paddles. You can slip a whole Greenland paddle into your deck rigging and easily yank it back out while underwater if you need to. Otherwise, with a classic European-style spoon-bladed paddle, you’ll need one that splits in half to tuck into your deck rigging.
Kayak rollers going this route, you need to practice either a hands roll or rolling with half a paddle. Toss your paddle, flip upside-down, draw your spare, and proceed as normal. Use extra snappy hips, lay back on your back deck, and pull your head up really, really late.
Lifejacket / PFD
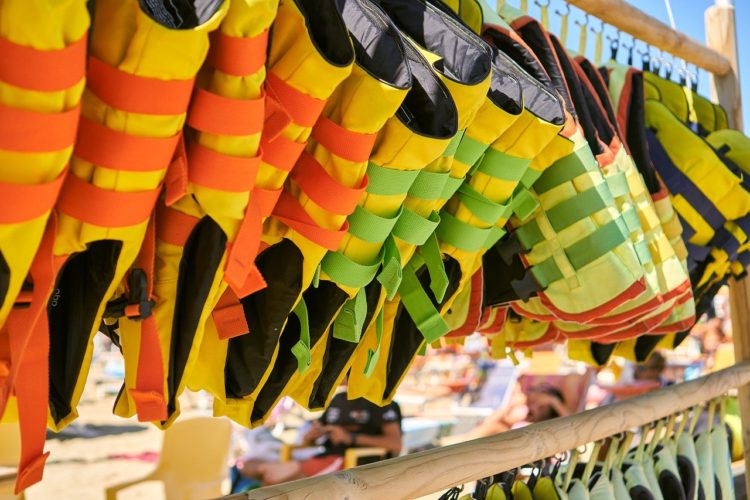
Life jacket laws vary place to place, but my firm advice is you need to be wearing one if you’re venturing onto big water.
We’re all guilty of loosening them up or tossing them aside on beautiful warm days in calm water, but this is not an option for sea kayaking. Too many things can go wrong, and you’re too far from help to risk it.
Keeping your jacket on is much easier if you have a comfortable one designed for paddling. Ski jackets and those awful orange horseshoe designs are terribly uncomfortable to paddle in, and the water skiing variety will overheat you very quickly.
Head to your local kayak shop and grab a good paddling jacket, rent one if you must. It helps to try them on for fit, but the Stohlquist Edge is a good affordable one we used to use for a wide range of people at kayak demos. I like the Stohlquist Rocker Whitewater PFD myself.
Whatever you choose, make sure it’s got an attachment point for a dive knife. They’re little plastic square things with a bit of standoff between the fabric and the middle square.
If you’re really into comfort and have the money to spend, consider an inflatable lifejacket. They’re way less of a pain, but make sure you grab a manual inflate variety so a splash or wave doesn’t set it off!
Wetsuit (As Required)
The American Canoe Association recommends that you wear a wetsuit if water temperatures are below 60 degrees F, or the combined air and water temperature is below 120 deg F.
How thick a wetsuit really depends on water temperature, but you do have to keep in mind comfort while paddling and balance those out. Definitely wear a wetsuit in cold water, but you’re not going to be able to paddle in a 12 mm wetsuit for really cold water. So either switch to a dry suit, or pick a warmer place to paddle.
Navigation
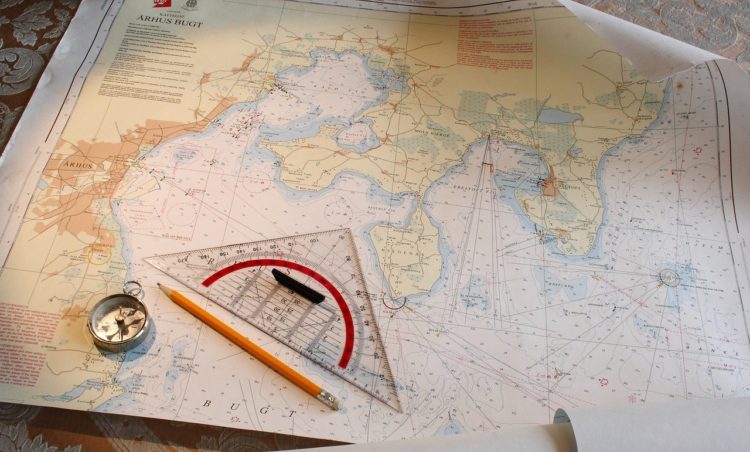
Fog can roll in, night can fall, or you can get turned around or blown off course. Make sure you have the tools to find your way back.
Compass
Either a little cheap orienteering compass you can hang on your PFD, or a globe marine compass set in your kayak deck can be huge for finding your way in the dark, fog, or heavy rain.
I’ve always loved trying to locate myself exactly on maps by taking bearings off landmarks and drawing lines on maps. Unfortunately I don’t have many tall landmarks around, so the water is about the only place I get to do this.
Charts
Charts are what you call maps at sea. They show you the coastline, but also what’s lurking under the water.
A paddler doesn’t have to worry near as much as a sailor or freighter about bottoming out and wrecking on a reef or shoal, but you do want to be mindful of depths, currents, and other obstacles marked there.
Charts also feature information about navigational signals. Each navigational buoy in an area has its own, distinct light pattern. A chart will tell you the location and signal (red light, 5 blinks long) for each one, huge for finding your way in the dark.
Waterproof GPS – Optional – Nice but Expensive
A waterproof, handheld GPS unit can make navigation easy. But they’re expensive enough to put them out of reach for many of us, and the batteries will die eventually.
If you have one, it’s probably a good idea to bring it.
Communications
The Coast Guard and Park Rangers are out there to help you, but you need to let them know you’re in trouble. The best thing you can do is file a float plan with any park, dock, or Coast Guard office that will take it as well as with family and friends.
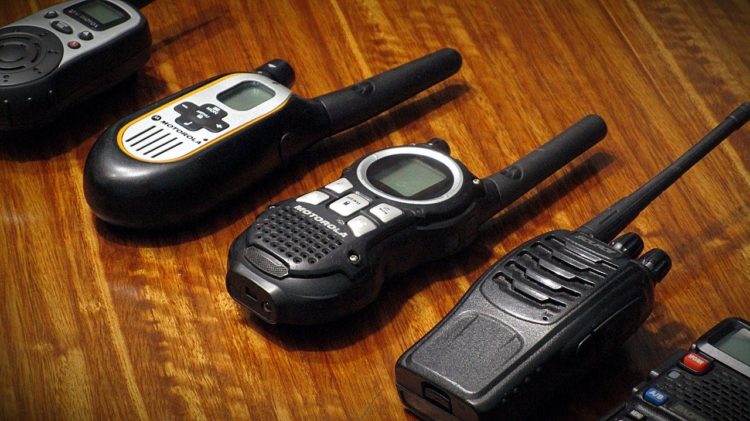
Marine Radio
Marine radios are set up to communicate on the frequencies used by the Coast Guard, National Parks Service, and other boaters. Marine radios are not necessarily buoyant or waterproof. They’re great for calling for help, recording a change in plans with the park rangers, or flipping over to the weather radio channel to get updates on the forecast.
If I didn’t borrow from a friend already flush with marine radios, I’d be eyeing the STANDARD HORIZON HX870 Floating 6W Handheld VHF with Internal GPS. Don’t think you need GPS in it though, Search and Rescue can track down your radio signal once they know you’re looking for help.
Remember that a radio with a dead battery is no good as a radio, so unless you’re looking for an anchor or paperweight, don’t sit around with it blasting all day.
Whistle & Signal Mirror
Sound and light travel great across water, and a cheap little Fox 40 or a slightly more expensive Storm Whistle (“loudest whistle in the world”) can grab people’s attention far better than yelling will.
Signal mirrors are used to reflect sun at an observer, grabbing their attention. Purpose-built ones like this one from Survive Outdoors Longer have a hole in the middle to help you sight, and that particular model has instructions printed on the back.
If you’re feeling industrious, go grab an old hard drive (it needs to be a disk / optical style, not a solid state) and crack it open. The disks inside are so highly polished they work even better than most mirrors for signaling, and come with a hole in the middle ready to go. Old hard drives can be found super cheap on eBay or at local thrift shops.
Use Morse Code for S.O.S. with either sound or light to get attention: Short-Short-Short, Long-Long-Long, Short-Short-Short. It’s become the universal distress signal, and almost anyone will recognize it.
Cell Phone
Great if you’re in range, but don’t count on it working if you haven’t tried before in the same area, with the same weather.
Keep it dry, keep it charged, hope it works.
Tow Line / Throw Bag
Any kind of boating, you should have a good length of line along to tie your boat up to a rescuer’s, or to help tow another paddler in distress.
Throw bags contain coiled up ropes stacked neatly to deploy easily. One end gets clipped on or held in your offhand, while you toss the bag to another person. Rope uncoils behind the bag as it flies.
Reentry Supplies
Flipping a boat on small lakes or rivers isn’t fun, but worst case you just swim it to the side and dump it out. In open water, when shore could be miles away, that’s not an option.
You’ll need some extra gear and skills for reentry in the middle of open water.
The biggest help will always be a competent paddling buddy. They can help you with an assisted roll (if you’ve already practiced this maneuver), T-rescue your boat to dump out the water, and hold it stable while you clamber back in.
Skirt
There are two types of kayak skirt: nylon spray skirts and the more robust, neoprene type.
Nylon spray skirts are more breathable and comfortable, but they won’t keep water out if you flip upside-down. Spray skirts are meant to keep the splashing and paddle drip water out of your cockpit.
Neoprene skirts hold on tighter, tight enough to resist water coming in if you flip. This is the kind whitewater paddlers wear for going through rapids. They’re a little less comfortable, and tougher to get on and off. Wearing one gives up the ability to stash stuff in between your legs in the cockpit and access it on th water.
Either kind can hinder your ability to pull free of the kayak if you capsize. Do not wear a skirt kayaking unless you’ve practiced wet exits with one in a controlled situation.
Bilge Pump
Make sure to strap a bilge pump, like this one from Seattle Sports, to your front deck rigging. Wrap the deck lines securely around the handle so it doesn’t wash away when you capsize.
Once you flip your kayak back over, even with a buddy, it’ll likely still have some water in it. Bilge pumps let you pump out most of that water so you can hop back in and paddle away.
Paddle Float
Seattle Sports also makes a good Paddle Float, a tool for helping with reentry.
The best aid for climbing back into your boat is another strong paddler, but if you don’t have that luxury, a paddle float is the next best thing. It’s like a pouch with inflatable air bladders on either side.
Slide one blade of your paddle into the pouch, bungee or velcro it shut, and inflate the air bladders. Slide the other blade under the back deck rigging of your kayak. Go ahead and climb back into the cockpit, coming up on the same side that has the paddle float acting like a kickstand.
Dive Knife
Whenever you’re around water and ropes or lines, you should keep a knife on your body and ready to use. It doesn’t take much of a knot or tangle in a line to hold you under the water, and you can even get tangled up in weeds, old fishing line, or scraps of nets. Don’t risk getting stuck with no way out.
Dive knives are ideal for this, they’re corrosion-resistant and come with sheaths designed to clip into a standardized base that’s sewn into various pieces of SCUBA gear, as well as good life jackets.
Pick something with a blunt tip (don’t stab yourself, any real dive knife will have this design feature), a sharp blade, and some aggressive serrations for rope cutting. Something like the Aqua Lung Big Squeeze, just make sure it’s stainless or titanium to keep it from rusting away in a hurry.
Basic Day Trip Gear
Keep all this in your day hatch, or in a dry bag that’s accessible from the cockpit. Snacks and sunscreen do you no good if they’re all tucked away up in the bottom of your forward dry hatch.
Dry Storage Containers
A lot of this gear doesn’t do you much good wet. The first aid kit lends itself to a hard-shell waterproof case clipped to your deck rigging, but the rest works better in your kayak’s dry hatches.
Keep in mind that dry hatches aren’t totally dry, so you’ll definitely want to spend a few bucks (they’re cheap) on some dry bags for a little extra insurance. SealLine and Sea to Summit both make good ones in a variety of sizes.
If you haven’t used them before, dry bags are vinyl bags with a fat strip on the lip, and a clip to hold them closed. You just load them up with gear, squish out the extra air, and roll the lip over as many times as you can before clipping it closed.
First Aid Kit
Mostly self-explanatory, pack your basic outdoor injury supplies in a waterproof case.
Keep it accessible.
Biggest tips here are to make sure you include supplies for dealing with hot spots / blisters from your paddle, hand moisturizing cream, and sunburn treatments. I’ve never been more tan in my life than after a two week kayaking trip, and that’s with tons of sunscreen. It’s all too easy to turn lobster on a trip like that.
Sunscreen & Bug Spray
The sun will toast you alive kayaking.
We’ve all heard about the sun bouncing off the water, but experiencing terrible sunburn under your arms is something else entirely. High SPF sunscreen is an absolute must, even if you’ve spent the whole summer running around without it, building up a base tan.
Make sure to have a hat to save your face, and you’re definitely going to want some good sun glasses. Toss a retaining strap on those sun glasses for maximum dorkiness and safety.
I can say from experience that paddling miles into the sun after losing your sun glasses really lessens your enjoyment.
An unexpected wave rolled me when a ferry boat went by, and while I’m a very competent kayak roller, I didn’t like the sudden 50 degree F water up my nose and rushed my first roll. Popped my head up too early and went back under, washing my sun glasses to the bottom. Second roll went fine, but I don’t kayak without a shade strap anymore.
Bug spray can be a lifesaver if you’ve got an area with lots of midges, black flies, mosquitoes, or other scourge pests. Breathing in clouds of insects gets old fast.
Rain, Cold, and Sun Gear
Weather can change quickly on the water, so you need to be prepared. If you neglect the sunscreen a little, a lightweight long shirt can help you out.
Paddling in a cold rain is no fun, so make sure your rain gear is accessible, and plan on a wide-brimmed rain hat to keep it off your face.
A cold wind tearing at you all day will get to you pretty quickly as well. A wind-breaker or some extra insulation can go a long way towards making your trip enjoyable.
Signaling
Toss an extra whistle and a signal mirror in your kit. They’re small and cheap, but can make all the difference in getting found. Sound and light travel pretty well over water.
Once, while I was training with my search and rescue team, we were running an exercise with both ground and air search teams. As wrapped up for the day, someone had the bright idea of testing signalling mirrors. We radioed up our plan, then all spread out into the woods, found a patch of sun, and started lighting up the plane. The spotter said it “looked like the biggest, brightest Christmas lights he’d ever seen. Couldn’t miss it if you wanted to.”
On the topic of search and rescue, another great, but slightly expensive piece of gear is an Emergency Location Transmitter. Included in most planes and many marine vessels, they’re just radio transmitters that ping on a designated frequency, signalling an emergency. Satellites monitor those frequencies, and alert local rescue teams when one goes off. Searchers track them down with the big H-shaped antennas you see on Animal Planet.
The ACR ResQLink 400 is a buoyant, classic radio version is available on Amazon for about $300. Otherwise, the SPOT 3 Satellite GPS Messenger is basically a text-only satellite phone. It’s about a third the price upfront, but requires a recurring subscription.
Snacks & Water
Long-distance paddling is hard work, and you’ll burn a lot of calories doing it. I usually grab a big “share” size bag of protein-packed candy, like Peanut M&M’s, and toss that on my front deck.
As with any strenuous outdoor activity, you’re going to need drinking water. Keep one bottle accessible, and toss at least one more in another hatch.
Survival Gear
No matter how experienced you are, things can go wrong. Lake Superior is famous for sudden storms that blow up with no warning, and I imagine plenty of other areas are as well. It really doesn’t take much to force you to shore somewhere unexpected, or blow you off course.
Expect the unexpected: bring along at least a small survival kit to cover your basic needs for a few days.
Light
It pains me to say it, because I ordinarily despise the things, but:
BRING A HEADLAMP, and keep it accessible.
A little change in the current, tide, or wind can make a paddle a few hours longer, and leave you finishing in the dark. A headlamp can keep you on course, especially along shore and in any bays, harbors, or streams.
If you get blown off course, odds are good it could be a little while before you make landfall, and that could happen in the dark as well. Setting up shelters, cooking food, picking a campsite are all done much easier when you can see.
Fire
Ordinary matches would not be my top choice for a water voyage. Grab some waterproof strike anywhere matches, a couple lighters, and/or a ferrocerium rod to give yourself options.
Packing a small fire starter, like some wax and dryer lint in an egg carton, one of these off Amazon, is a good idea as well. Starting a fire in a hurry to get warm, or in blowing rain while dripping wet is a world apart from fire-starting practice in the backyard.
Be sure you’re up to speed on primitive fire starting methods if you’re relying on anything like a ferro rod. Also a good idea to brush up and practice making friction fires and the like if you’re going on an extended, remote trip. Check out my article on Primitive Fire Skills to refresh your memory, or learn a few new tricks.
Water
I’ve got a whole article on water treatment (which happens to be my secondary engineering specialty) using whatever you can find in the backcountry, but bringing a few small, lightweight supplies along can make it much easier on yourself.
Grab a personal Lifestraw, some chemical water treatment tabs, and something you can easily boil water in, like a metal cup or water bottle. Filtration will get most of the big stuff out, but little parasites that can give you a really hard staying hydrated can easily slip through, so plan to boil or chemically treat anything you filter.
If you’re paddling in salt water without many fresh water sources on any land you might conceivably be forced to survive on, pack some small folded up plastic sheeting to make a solar still. You could also boil salt water and catch steam on the sheeting to drip fresh water down into another container.
Shelter
What to pack here depends hugely on where you are. At bare minimum, pack some rope and nylon sheeting or tarp to act as a rain fly and sunshade. You might need mosquito netting and a hammock in more tropical climates, or an insulated tent in colder areas.
Plan for the weather, and know that if you need to use this, it may be while you’re already dripping wet and hypothermic. Err on the side of being too warm in cold climates.
In really remote areas, you might want to include tools to build a more permanent shelter. Folding saw, hatchet, machete, and more cordage will make those much more achievable.
Food
Toss in some emergency food. It doesn’t have to be fancy, it doesn’t have to be a lot. Food is the last thing on this list because it’s going to kill you the slowest, but it’s also a huge morale booster to have some along.
I just have an old Mountain House meal kicking around the bottom of my survival kit. I’m not a fan of how salty they are normally, but I won’t complain if I ever have to crack that one open.
Last Tips
Don’t go sea kayaking until you’ve had a chance to practice with all of this gear. You need to be competent and confident navigating, reentering a capsized kayak, and living off the gear in your survival kit. Don’t let the time you really need any of this be the first time you’ve used it.
Make sure to brush up on your Primitive Fire Skills and Improvised Water Treatment (links to my articles on the topics) before you go anywhere really off the beaten path!
Try to have your first few trips be guided ones. Professional guides are paid not only to make sure you come back safe, but to make sure you have a fun time as well. Guides can get costly, but odds are the actual guide on your trip isn’t getting a huge paycheck. Check up on tipping norms in your area before you schedule so you can be sure of what it will all cost.
If you think I’ve missed anything, or have questions on anything you’d like to read more about, please comment below! I look forward to hearing from you!