

Perhaps one of the easiest devices to make and use reliably is the bow. While a crude, albeit useful, version may be cobbled together from a bundle of sticks satisfactorily enough for a survival situation, you can very easily design and build a lighter, stronger, more reliable bow with just some basic knowledge of the physics and materials involved, and a pocket knife or hatchet.
In this article, we’ll run through some relevant physics that will be of use in the construction of a bow, and in general life. Then I’ll present the survival bow from the US Army Field Manual on Survival, and finally dive into design and construction of a more elegant version.
Once you’ve got a bow in hand, head on over to my article on my top tips for archery, based on having taught hundreds of people (young and old) to shoot in my years as a camp counselor.
Table of Contents
Physics of Energy Storage and Transfer
If you’ve ever tried to throw an arrow as hard as you can, you’ve experienced an interesting situation: no matter how hard you throw, the arrow won’t fly nearly as fast as you can achieve with a fairly light-draw bow. You put more into the arrow, but get less useful work back. This is the concept of efficiency, namely that you can get an idea of how well the energy converts from one form to another.
Energy, defined in physics as the stored capacity to do useful work, is what we’re trying to transfer from your body to the arrow. There are different kinds of energy: chemical as in batteries; potential energy from position, perhaps at the top of a cliff; kinetic, from movement of mass, and many, many others. Efficiency is the ratio of energy out divided by energy in. No process is 100% efficient, there are always some losses.
The efficiency of transferring energy from you to an arrow can be increased by using a bow. The bow stores energy in its limbs, like a spring, and then must quickly transfer that energy down the string, to the arrow, before the arrow leaves the string. Heavier draw-weight bows store more energy, as it takes more work (physically defined as force times distance) to reach our standard 28” draw length.
The type of bow dictates how quickly the energy is transferred to the arrow. Longbows are slower, compounds faster, and recurves faster still. This is because the inertia, or resistance to motion, of a light-weight (not draw weight) limb, and a shorter limb, is less. From this, we can see that a very strong, physically lightweight and hopefully recurve bow will be the most efficient.
Survival Bow: Quick and Dirty

You’re lost in the woods. You’ve taken your time and kept your head, dealt with your needs according to how pressing they are. Built a fire, shelter, and water filter (more to come here). Now you’re hungry. Really hungry.
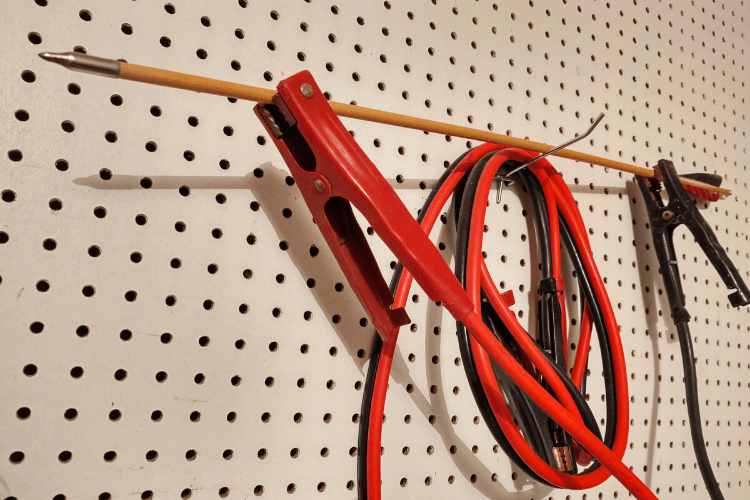
First bet would be stuff that doesn’t run away, like wild edibles, but maybe you’re somewhere strange and don’t trust your knowledge. Next up, get some traps down. Deadfalls, fish traps, and snares all work while you sleep, hunt firewood, or whatever else. Finally, if you don’t yet have a real weapon, grab a stick. A decent stick about the length of your arm and thickness of your wrist, sharpened at the tips, will bring down most small-to-medium game if thrown side-arm. Finally, it’s time for something a little more refined, but make sure you have the materials and knowledge to fletch some arrows, or a bow won’t do you much good.
This bow is basically a bundle of sticks. If you were to string up a stick about the diameter of a quarter, straight and slightly tapered, you may as well go back to throwing arrows. But there’s an easy way to improve. Take a dozen or so sticks, depending on their thickness, and split them into two groups. Lay them out such that the thicker ends of half of each group point one way, and the other half the other way. Cross the bundles in their centers, and secure them with a square lashing. Then take two adjacent bundles, bring them together, and bind the tips with a round lashing. Repeat with the other two tips and string it up. It ought to look something like the sketch at the beginning of this section.
Building a Better Bow
Structure of Wood
Wood is made up of long, fibrous lignin cells, laid out parallel to each other. The structure is similar to a bundle of drinking straws. The grain of the wood is the direction these lignin fibers align in. No doubt you’ve heard the phrase “work with the grain” before. This is because the properties of the wood vary with the direction. The fibers are much stronger than the matrix material binding them together. Try splitting wood in different orientations to the grain, and you will see the ax either split the wood easily, or bounce off.
Drumsticks and Grain Structure
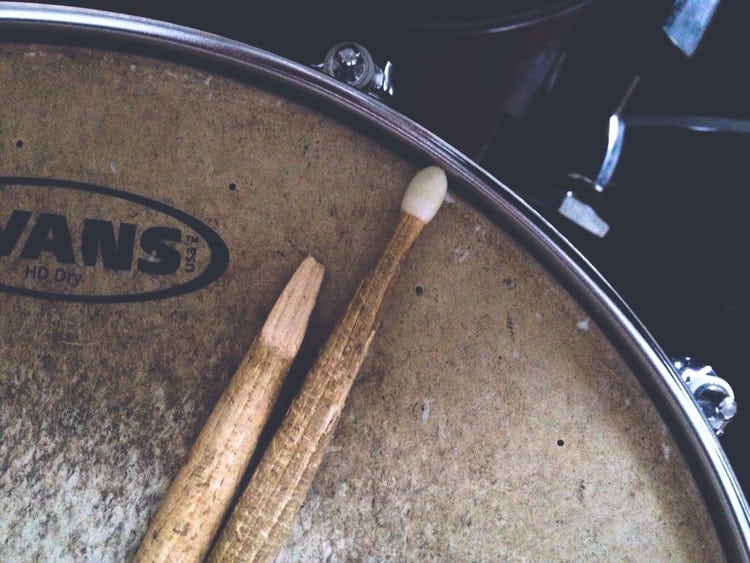
I used to play in a band with a drummer who also drummed in a heavy metal band. He always played too loud, and often broke his sticks. One day I took him to the store and dug through the bin to find him a pair where the grain ran the length of the stick, instead of off at a sharp angle. These sticks never broke, and served them well until he lost them. He learned to watch the grain, and while he still plays too loud, he goes through far fewer sticks. Clearly, with the high stresses in a bow, we want to use the grain orientation to ensure the limbs do not break.
When a tree first starts out in life, it is growing fast, and that is about its only concern. This results in annual growth rights that are widely-spaced and not very dense, with plenty of irregularities. In any material, sharp, sudden changes are flaws where it can break at far lower stresses than the material could otherwise handle. In a bow, as in most things, breakage is bad. Do not use thin, young trees for strength. Also, any time you cross a growth ring, you present a flaw to fracture your wood. Larger trees have larger diameter growth rings, which are thus flatter and more “bow-shaped”.
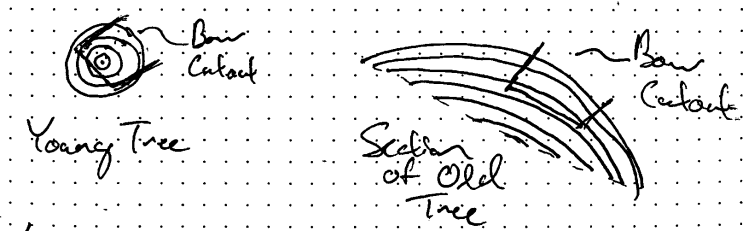
As you can see, a bow stave cut from an old tree will be more uniform and can be kept from crossing many rings. This makes it much more suitable for bow-making.
Wood Species
Various species of trees have quite different properties. Cedar is lightweight, often straight-grained, and is rot-resistant, making it very good for arrow shafts and fence posts. However, cedar is very brittle, therefore it’s a terrible bow wood. Black walnut is extremely strong, but it is heavy and brittle.
Ideal woods for bow building include Yew, Hickory, Ash, Osage-Orange, Black Locust, and other similarly tough and springy woods. Keep in mind that you can use any wood, but the knottier and more brittle woods will be much more likely to snap after only a few uses. When dealing with less-than-ideal woods, longbows with flatter profiles are the most forgiving design, but they’re not terribly quick shooters. Longbows are also difficult to carry through dense underbrush.
Finally, knots and twisted grain must be compensated for. They are imperfections in the wood, and can allow cracks to start. Simply leave the limb wider near the flaw, and tiller as needed to keep a smooth bend.
Choose the Right Style
While the D-profile of an English Longbow is a fantastic design, it requires better materials and more skill than most (including me!) possess.
I grew up carving bow after bow, and each one eventually shattered in my hands. In engineering school, I came to understand that the deep shape of the English Longbow is very structurally efficient (lots of stiffness / strength from a given amount of material) but very demanding on the materials as well.
Beams in buildings are designed to be very stiff so as to not sag very much, but the limbs of a bow need to flex a lot to give us that 28″ standard draw length. Those deep beam profiles are more similar to the English Longbow, minimizing material weight and inertia of the limbs. But that is only possible because of the very high tensile strength of yew sapwood, and very high compressive strength of yew heartwood. Most woods are good at one or the other, but not both.
I usually made bows from ash growing up, and the compressive strength of ash just can’t support the demands of a deep limb shape. I’d often spot wrinkles on the belly of my bow shortly before it shattered in my hands, but didn’t know what was happening yet.
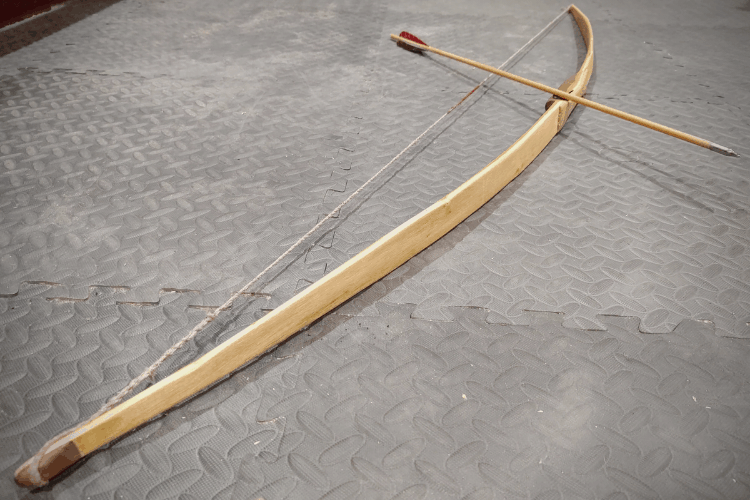
A flatbow isn’t nearly as efficient as an English Longbow, but it is much more forgiving. My first attempt at a flatbow was far more successful than every longbow I ever tried to make. I used plans from vintageprojects.com and did most of my stock removal with a combination of hatchet and aggressively-set bench plane (I use a restored vintage version of the Stanley #4).
Tillering
Tillering is the process of shaving away thin bits of material to produce a bow near the target draw weight and with a smooth, consistent curve. Because wood is not uniform, a bow limb with a smooth taper may have large kinks when drawn. These are caused by areas of weaker / less dense wood.
The basic premise is to try to bend the bow while watching the limbs, and remove small bits of material where the bow is too stiff. Leave the areas that are too compliant alone.
I learned to tiller much better when I drew on my structural engineering background. The stiffness of a rectangular wooden beam depends on the species of wood used, and the dimensions of the beam. Within a given species, the biggest influence is the depth of the beam.
The dependence of beam stiffness on depth is cubic, meaning that if you double the depth of the beam (all other things being equal), the new beam is eight times as stiff. The dependence on width is just linear, double the width gives double the stiffness.
Knowing beam depth has far more influence on stiffness than width, we can apply that to tillering bows efficiently. Removing just a little bit of thickness off the bow will result in drastic changes, the sort we’re looking for when the bow won’t even bend enough to be strung.
Trimming the width of the bow will give much more precise control. Use width adjustments in areas that are just a little too stiff, to keep from overshooting.
Almost every bow I’ve ever screwed up in tillering was by thinning the limb depth just a little too much, leaving me with a toy instead of a hunting bow.
Other Considerations
Note that bows made from “green” wood will change over time. Moisture content in trees is as high as 80%, and that of well-seasoned firewood may be as low as 7%.
Just as green wood burns differently than dry wood, it behaves different in bows as well. Green wood is much more flexible, and it is also heavier.
You can make a bow green, but never leave it strung. As it dries, it will set into the bent shape and lose strength. The bow will also become more brittle. You may end up with a bow that worked originally, but now is far too short for the brittle dry shape, and will shatter when drawn.
Either accept this and tiller it down to a lower draw weight, or don’t make bows green.
Also, as I mentioned in passing, a smooth arc is key to a durable bow. Kinks in the limb will become fracture points and ruin the bow. It’s better to drop the draw weight a bit to compensate for a kink than to have a bow explode.
That’s not fun as your work is gone, and there is the added danger of splinters flying in all directions. On that note, always draw slowly and carefully the first few times, to “train” the bow. Also, think about looking away from the bow on those trial draws to preserve your eyes.
If you’re ready to shoot your new bow better as well, head on over to my article Archery Tips from a Camp Counselor to see what you can learn from my ten years teaching kids to shoot at a summer camp!
